
Cylinder Inspection Training: Why a Maintained Cylinder Is a Happy Cylinder
Uncover the importance of gas cylinder inspections and training. Dive deep into ensuring safety, boosting efficiency, and prolonging cylinder life.
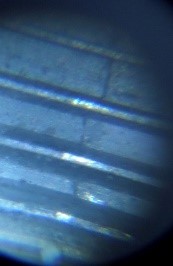
During the cylinder inspection process, inspecting the threads is often considered the most difficult to view and assess. Common approved procedures allow for a light and mirror to be moved around the inside of the threads, looking for corrosion or cracks. If something is located, it is difficult to assess. The mirror has a small diameter, and based upon an individual’s eyesight, features are difficult to differentiate. When someone comes across a perpendicular line within the threads, they commonly think that a crack has been found. However, cracks are not common, and many other anomalies are generally the culprit. The inspector could be seeing a fiber, stain, shadow, or a Tap stop. All of which are acceptable within the threads.
The inspector, without looking further, will erroneously condemn the cylinder. They assumed they found a crack and did the correct action by condemning the cylinder. Most of the time, what they condemned was a normal manufacturing issue, or dirty thread. Fibers, shadows, and stains can be wiped or cleaned, to show an intact thread. But a Tap Stop, the most misunderstood issue, cannot be wiped away. Since a Tap Stop, can be easily confused with a crack cylinders are removed long before their projected service cycle.
A tap stop is simply a fold in the metal of the thread. This fold has no structural implications. But the fold creates a different elevation in the surface of the metal. This difference in elevation, in a perpendicular pattern, creates the visual effect similar to a crack. A crack is a separation in the metal. A tap stop is simply a fold. But since they both appear in a perpendicular fashion; it is difficult to discern between the two.
What causes a Tap Stop Mark?
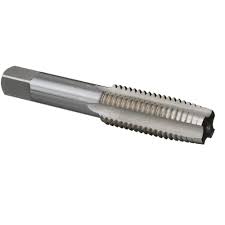
When a cylinder is being manufactured there is a rough opening, designed to place a valve upon further processing. Once the metal is formed into a crown, and the opening is ready, threads are created within the opening. To create the threads, a TAP is inserted to the specified diameter. The TAP rotates into the opening, stops, and is then rotated back out. During the back out process any loose metal is folded back on itself. There is only a small amount of metal, so the fold is small and distinct, like a crack. This does not occur every time. Only in a small percentage of cylinders. However, it could be considered fairly common, unlike a crack, which is rare.
What differentiates a Tap Stop from a crack?
Tap Marks are formed by a man-made tool. It is engineered to certain specifications; therefore, it creates a very specific pattern. A crack is formed by natural forces, therefore, will have numerous variables. A TAP will have a specific number of “sides” or formations. Cracks are variable, normally one or two. The tap creates the folds near the bottom of the threads, and normally only protrude up a few threads. Cracks, if unchecked, will continue to grow along a vertical path. The way you tell the difference is by marking and counting the potential concerns the inspector sees within the threads. If you develop a pattern – a certain number of marks, equal distances apart, you likely have a Tap stop mark, and the cylinder can remain in service.
How do you mark or test the Tap Stop vs. Crack protocol?
During the thread inspection process have a grease pencil or some other marking device. Each time you see an area of concern, mark the location on the outside of the cylinder. When the inspection is completed step back and look at the marks. If you have over three, equal distances apart, you have a tap stop.
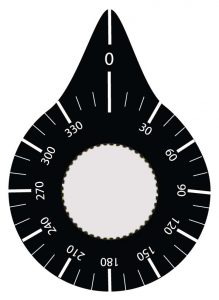
Cylinder Training Services has developed a Cylinder Thread Viewer, with an index plate and built in laser to help locate specific areas. The index plate has a point, which is easily gripped, and a 360-degree marking sticker, affixed to the index plate. You place the index plate point on a specific location of the cylinder, such as the first letter of the serial number. This becomes your reference point. As you rotate the unit through the threads the laser tracks along the index plate. Each time you find an area of concern, see where the laser lands, and record that number. When you look at the results, and there is a pattern, such as every 30 degrees, you know you found a tap stop.
Some final points:
Tap stops are more common than cracks. If I were to guess on a number, based on personal experience, I would say 25-30% of cylinders may have a tap stop mark. Finding a crack is much less, 1%-2%, based on personal experience. Cracks are rare. When you record any concerns, you may not see exact degrees all the way around the cylinder. For example, on a 6-sided TAP, you might only see 3 tap marks. But they will be equal distances apart. This is because the valve opening may not be perfectly round, or the TAP may have had a slight angle. But the three you locate, will be equal distances apart.
When a technician is reviewing the threads of a cylinder, and they find something unusual, do not jump to conclusions. If a technician says they found a crack, be skeptical. Clean the threads, displacing the fiber, or mark, and check again. Do not rush to condemning a perfectly good cylinder.
For those that prefer to watch a video, versus read, Cylinder Training Services has put together a short video explaining how to tell the difference between a Crack and a tap Stop Mark. CLICK HERE

I enjoy continuing to build the business based on safety since 1999. CTS focuses on the inspection of high pressure cylinders, the maintaining of the valves and basic maintenance of high pressure compressor systems. CTS stays current in techniques and tools to train both the new and novice employee. We publish articles, update training tools and have created an APP to assist during the inspection process.
#cylinder #safety #hazmat #training #cylinderinspectiontraining #cylindex

Uncover the importance of gas cylinder inspections and training. Dive deep into ensuring safety, boosting efficiency, and prolonging cylinder life.
Is your composite cylinder showing signs of wear? Discover when to seek a professional repair service in our comprehensive guide.
29 CFR 1910.101 intro Handling cryogenic cylinders involves working with extremely low-temperature gases that pose unique safety risks. To ensure the safe handling, storage, and transportation of these hazardous materials,

Introduction Firefighters encounter many risks while on duty, including hazardous materials and high pressure bottles. High pressure bottles are used for a variety of purposes in firefighting, including powering hydraulic